How to set the center of rotation when viewing a 3D PDF file

Phil is an entrepreneur and consultant with a background in 3D software, specializing in solid modeling and data translation. He has worked for both small and large companies in a range of technical and sales positions and have specialized in 3D PDF since 2010. He is very active in the … Read more


When navigating a 3D PDF, there may be times when you want to change the center of rotation for the Rotate tool. For example, when navigating around an assembly, you may want to isolate and rotate around a particular part or face. There are a couple of ways to do this in the Adobe Reader and Adobe Acrobat, but it is not always intuitive.
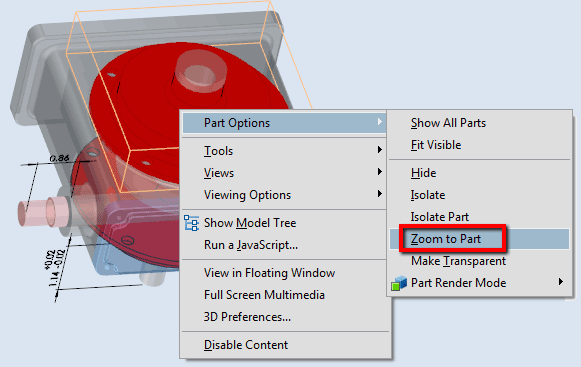
The easiest way to change the center of rotation is to select a part in the 3D Window or in the model tree, then right click and select Part Options -> Zoom to Part:

This centers the camera on the centroid of the selected part.
An alternative to this is to use the Camera Properties dialog for finer control when setting the the center of rotation. You can activate the Camera Properties dialog by either selecting the button on the 3D Toolbar:

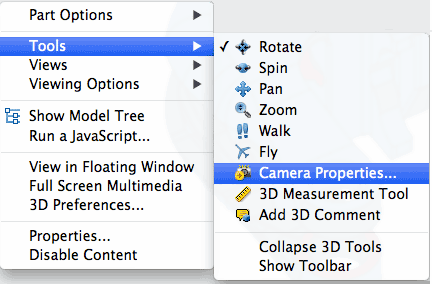
Or by right clicking in the 3D window, then selecting Tools -> Camera Properties:

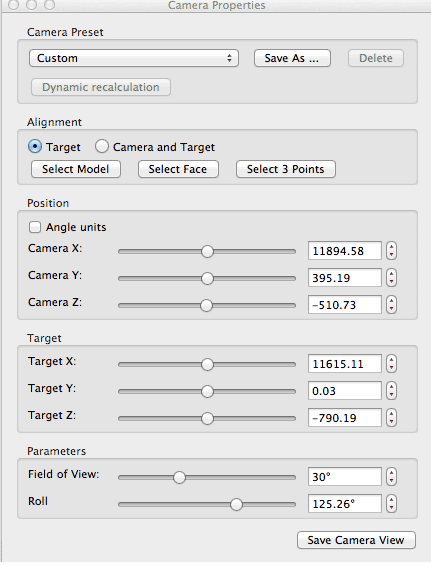
The Camera Properties dialog box will appear:

The Alignment section of the dialog box allows you to easily set the center of rotation. You can select a Part, Face or 3 points to define your center of rotation. Check the Camera and Target button and your center of rotation will be changed.


